


![AutoFull G7 Ergonomic Gaming Chair [🍂Autumn Special Offer] AutoFull US](http://www.autofull.com/cdn/shop/files/gaming_chair_1_c5f546de-af69-4926-b5e4-a859ea893772.jpg?v=1777458714&width=70)


![AutoFull G7 Gaming Chair & A4 Pro Gaming Desk Bundle [💥Combo Off] AutoFull US](http://www.autofull.com/cdn/shop/files/20251109-151002.jpg?v=1762672486&width=70)
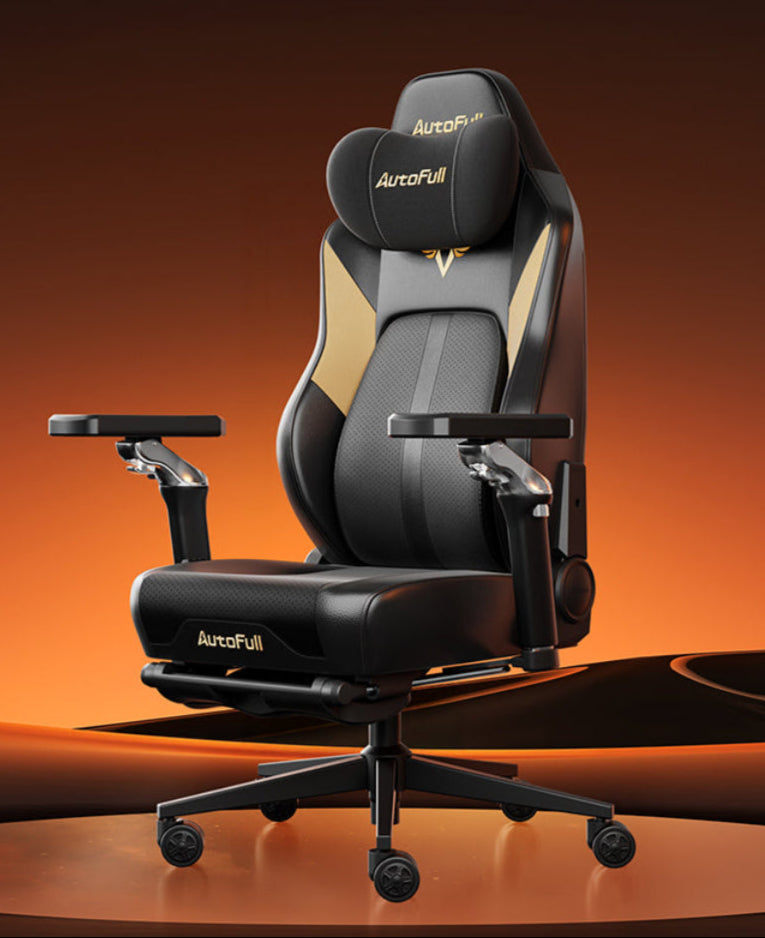


Assembling an adjustable gaming chair is generally not difficult and typically takes between 20 to 45 minutes for a single person. Most manufacturers include all necessary tools, such as an Allen wrench, within the box, meaning you do not need a professional toolkit to finish the job. While the process is straightforward, focusing on the correct orientation of the tilt mechanism and the alignment of the backrest is essential to ensure long-term structural stability and ergonomic comfort.

What Tools Do You Need To Assemble a Gaming Chair?
You typically do not need any external tools to assemble an adjustable gaming chair, as almost every brand provides a multi-purpose Allen key or T-handle hex tool in the hardware blister pack. While the included tools are sufficient, having a few household items on hand can make the process faster and more comfortable, especially if you are working on a carpeted surface.
Check the provided hardware blister pack
Before starting, lay out the hardware pack. It usually contains several sets of bolts (M6 or M8), washers, and the required Allen key. Some premium chairs also include a small magnetic screwdriver for the side covers. Identifying these parts early prevents the frustration of searching for a "missing" screw that might actually be pre-installed in the seat base for shipping security—a common feature in a modern adjustable gaming chair.
Prepare a flat and spacious workspace
You need a clear floor space of at least 5x5 feet. Assembling a chair on a table is not recommended due to the weight of the components. However, using the cardboard shipping box as a makeshift "workbench" is a professional tip. Placing the seat base on the box allows you to install the tilt mechanism without the armrests hitting the floor, making the adjustable gaming chair setup much more ergonomic for your back during the build.
Consider using your own tools for speed
While the included Allen key works, using a ratcheting screwdriver with a hex bit can cut your assembly time in half. If you use a power drill, ensure the torque setting is very low. Over-tightening with power tools can strip the internal threads of the chair's frame, leading to a "wobble" that is nearly impossible to fix later. Manual tightening is always preferred for the final quarter-turn to ensure a secure fit.
Follow This Step-by-Step Adjustable Gaming Chair Setup
A successful gaming chair assembly guide follows a "bottom-up" approach, starting with the wheelbase and ending with the attachment of the backrest. Following this logical sequence ensures that the heaviest parts of the chair are supported by the base throughout the process, reducing the risk of dropping components or straining your muscles.
Build the base and gas lift assembly
Start by flipping the five-star base upside down and pressing the casters (wheels) into the sockets. Most casters require a firm push until you hear a "click." Once the wheels are in, flip the base over and insert the gas lift cylinder into the center hole. Crucial Information Gain: Most gas lifts come with a plastic protective cap on the activation button. You must remove this cap before installing the seat, or the height adjustment handle will not work once the chair is finished.
Attach the tilt control mechanism to the seat
Locate the seat base and flip it over. You will see four threaded holes. Place the tilt control plate over these holes. It is vital to check the "Front" arrow engraved on the metal plate; if you install it backward, the chair will tilt forward instead of reclining, which is a safety hazard. This stage of the adjustable gaming chair setup is when you should ensure the armrests are also centered and tightened if they were not pre-attached by the manufacturer.
Join the seat base to the gas lift
Lift the completed seat assembly and align the hole in the control plate with the top of the gas lift cylinder. This part can be tricky because the seat is heavy. Once aligned, lower the seat onto the lift and sit on it firmly. Your body weight creates a "friction fit" that locks the two components together. There are no screws required for this step, as the tapered design of the gas lift secures it naturally under pressure.
Align and secure the backrest
This is often the most difficult step of a first-time gaming chair assembly. Align the backrest between the two metal brackets extending from the seat base. Start by inserting the bolts by hand on both sides before using the tool. This allows the backrest to "float" slightly, making it easier to align the holes. Once all four bolts are started, tighten them in a cross-pattern (top-left, bottom-right) to ensure the backrest is perfectly level.
Learn How to Assemble a Gaming Chair Safely
To learn how to assemble a gaming chair safely, you must respect the weight of the steel frame and the high-pressure nature of the gas lift. Mishandling these components can result in pinched fingers or a compromised chair structure. Safety during assembly isn't just about avoiding injury; it’s about ensuring the chair doesn't fail while you are sitting in it during an intense gaming session.
Handle the recline mechanism with caution
The recline hinge on the side of the seat base is under extreme spring tension. Never pull the recline lever until the backrest is fully bolted into place. If you trigger the lever prematurely, the metal bracket can snap forward with enough force to cause a serious hand injury. Only test the recline function once the adjustable gaming chair is completely built and you are safely seated in it.
Avoid cross-threading the bolts
Because gaming chairs use steel bolts into steel frames, it is easy to "cross-thread" a bolt if it enters at an angle. If you feel significant resistance within the first two turns, stop, unscrew the bolt, and try again. A cross-threaded bolt will never fully tighten, leading to a squeaky, unstable chair. Always start every bolt with your fingers to ensure it is seated correctly in the threads before using the Allen key.
Use a second person for the backrest
While many guides explain how to assemble a gaming chair alone, having a second person to hold the backrest in place while you bolt it in is highly recommended. The backrest is top-heavy and tends to tilt, which can bend the mounting brackets if not supported. A second set of eyes also helps ensure that the backrest is perfectly vertical before you perform the final tightening of the bolts.
Apply Expert Gaming Chair Installation Tips
Professional installers use specific gaming chair installation tips to ensure the chair remains silent and sturdy for years. These "pro secrets" focus on the small details that standard manuals often skip, such as lubrication and bolt tension management, which are critical for the longevity of any high-performance adjustable gaming chair.
Implement the "Two-Stage" tightening method
Never tighten a bolt to 100% until all bolts in that specific section (like the seat plate or backrest) are installed. Tighten them all to about 50% first. This allows the parts to shift and settle into their natural alignment. Once all bolts are in place, go back and tighten them fully. This prevents the frame from being "pulled" out of alignment, which is the primary cause of uneven armrests or a crooked backrest.
Lubricate the contact points
If your chair starts squeaking after a week, it is usually because of metal-on-metal friction at the tilt mechanism. A pro-level gaming chair installation tips involves applying a tiny amount of lithium grease or WD-40 Specialist Silicone to the bolts and the pivot points of the tilt plate during assembly. This simple step ensures a silent operation and prevents the "creaking" that plagues many budget-friendly gaming chairs over time.
Check the tilt tension adjustment
Once the assembly is done, don't forget to adjust the large circular knob under the seat. This controls the "tilt tension." Many users think their chair doesn't tilt, but the tension is simply set too high for their weight. Turn it counter-clockwise to loosen it. Finding the right balance during your adjustable gaming chair setup ensures the chair moves with your body rather than resisting your every movement.
Overcome Common First-Time Gaming Chair Assembly Mistakes
Many users encounter the same hurdles during their first-time gaming chair assembly, often leading to a chair that feels "broken" right out of the box. Recognizing these errors before you start can save you hours of troubleshooting and prevent the need for an unnecessary product return.
Forgetting the gas lift cover
Almost every gas lift is shipped with a red or green plastic cap to prevent the cylinder from activating during transit. If you forget to remove this, the height adjustment lever will have nothing to press against. If your chair is stuck at one height, you will have to disassemble the seat from the base—a difficult task—to remove that tiny cap. Always double-check the gas lift before clicking the seat into place.
Installing the tilt mechanism backward
As mentioned earlier, the "Front" label on the seat mechanism is easily missed. If the lever is on the wrong side or the tilt tension knob is facing the rear, the chair's center of gravity will be off. This makes the chair prone to tipping over when you lean back. If the chair feels unstable or "tipsy" during your first-time gaming chair assembly, the tilt plate orientation is the first thing you should check.
Misaligning the side decorative covers
The plastic covers that hide the backrest bolts are often the flimsiest part of the kit. They require a small screw that is easy to cross-thread or over-tighten, which can crack the plastic. A common mistake is trying to force these covers on when the backrest brackets aren't perfectly flush. If the cover doesn't fit easily, it's usually a sign that your backrest bolts aren't fully tightened or are slightly misaligned.
Assemble Your Gaming Chair Right the First Time
Assembling an adjustable gaming chair is a manageable task that rewards patience and attention to detail. By following a structured gaming chair assembly guide and avoiding common pitfalls like leaving the gas lift cap on, you can ensure a safe and professional result. Remember to tighten bolts in stages and verify the orientation of the tilt mechanism to guarantee the chair's ergonomic benefits. Once the setup is complete, your new chair will provide the stable, adjustable support needed for both peak gaming performance and daily productivity.
FAQs About Gaming Chair Assembly & Troubleshooting Tips
Can I assemble a gaming chair on my own?
Yes, you can easily assemble an adjustable gaming chair by yourself. Most people find that the only challenging part is balancing the backrest while inserting the first two bolts. If you are working alone, use the shipping box to support the seat base, which keeps it stable while you align the backrest brackets.
Why won't my gaming chair go up or down after assembly?
The most common reason is that the plastic protective cap was not removed from the top of the gas lift cylinder. If the cap is still there, the lever cannot trigger the hydraulic mechanism. You will need to remove the seat base from the gas lift to take the cap off. Another possibility is that the height adjustment cable or lever is not properly engaged with the control plate.
How long should a first-time gaming chair assembly take?
For a beginner, a first-time gaming chair assembly usually takes 30 to 45 minutes. This includes time to unbox the components, verify the hardware list, and follow the how to assemble a gaming chair instructions carefully. Experienced builders can often finish the process in under 20 minutes.
Do I need to re-tighten the bolts after using the chair?
Yes, it is highly recommended. After the first week of use, the materials will "settle," and the bolts may loosen slightly due to the heat and pressure of your body weight. Checking and re-tightening all bolts after seven days is one of the most important gaming chair installation tips for preventing long-term squeaks and wobbles.
What should I do if my chair is leaning to one side?
If your adjustable gaming chair is leaning, check the four bolts connecting the tilt mechanism to the seat base. If one side is tighter than the other, it can cause a slight tilt. Also, ensure the casters are fully "clicked" into the base. If the base and wheels are level, the issue may be a slightly misaligned backrest, which can be fixed by loosening the side bolts and re-aligning the backrest before tightening them again.


